Sunday, December 19, 2010

Unfinished Christmas Spirit

The Christmas project. Well, I did come up with a plan, though perhaps a flawed one; I'm not quite sure how it is actually going to all go together. That is a problem for another day!


If you know me, or have been following this blog, it will come as no surprise that this Christmas project isn't done either! Like my preparedness for Christmas this year, this Christmas Spirit isn't yet whole. Sure, I have 6 more days until Christmas, but I'm not fooling anyone. The likelihood that this piece will be finished on time is slim. Doesn't matter. All the Christmas fabrics go on sale 40% off AFTER Christmas, so I'm just saving myself a little bit of money on this one.


When inspiration struck for this project, I started, even though the right supplies weren't on hand. I only had this natural wool, though I needed red and green. I figured that would be fine, and I can just dye the pieces when they're done. Now that I've had time to think about it, I don't really know if I can mix a dark enough red or green dye, but we'll have to wait on that one too! Really, part of the fun in dying is the varied and surprise results.


These are the pieces I've crocheted so far. Once all the pieces are done, I'll dye them, then full them and finally assemble the Christmas Spirit. I also wonder about the use of Shiva paintstiks on wool. Can it be done? Should it be done? Worth a shot I guess, not like I'll ever wash the final piece.


Stay tuned over the next few weeks to see the finished Christmas Spirit. 5 more days of work and then nothing but art for me for 16 days!

Sunday, November 21, 2010

34 days until Christmas. Just thought you'd like to know too! I wasn't so happy with that info because I really dislike Christmas. With my current health issues, I'm not going to be doing a whole lot of anything for Christmas this year, though I did promise my son that we WILL put up the tree this year.
I'm only thinking about Christmas at all today because for the upcoming meeting of the fibre arts group I belong to we are asked to bring in a Christmas themed art piece that we've done. Simply, I've never done one (though I've considered making a beautiful Christmas tree and then cutting it up and piecing it randomly back together...).

I'm not a total scrooge though. There are things I like about Christmas like...ummmm...cute fuzzy animals covered in snow-you know, like bunnies and polar bears. I like the patterns that ice makes in a frozen river, spiced rum and fireplaces, snow covered pine trees....
Except none of those are specifically "Christmas" I'm being told. Those are Winter themed! Okay, fine-I'm challenging myself to find something to make that's Christmas themed and get it done by Christmas (or maybe even by that Innovative Threads meeting!)

I haven't made any new art lately, none since Candy and the necklace for the fabric challenge, but my hands and sewing machine haven't been idle. I made my nephew's hats for a parade. The theme was Where The Wild Things Are.

I also had to attend a friends wedding and decided to make my dress. I learned I don't really enjoy making clothing, but I think I would like to make another of these, with the skirt being made from pieced scraps of hand painted and dyed fabrics.

Wednesday, November 3, 2010

What To Do With the Ugly Fabric

I don't seem to finish too many projects. I get close, get them almost done, but rarely finish them in their entirety. So, I am thrilled with myself that I have finished, completely finished, 2 projects recently, and finished them by their deadline! First was Candy, who I've already shared her in the last couple of posts (in case you missed her). Candy was all I intended on doing for the ITK challenge, but...well... things changed. Someone had asked me what I made for the challenge, and I replied, "an ugly doll". She replied back that she was sure my doll was just beautiful the way it was and that I'm too hard on myself.
That's nice of her to say...but I wouldn't call Candy, "just beautiful" by any stretch of the imagination. I've embraced her and I'm happy with the outcome, but beautiful isn't an appropriate descriptor. Ugly fabric, ugly doll was my thought on this. (Even the free quilt pattern from Hoffman for this Petal Punch fabric line uses only 7 small squares of this particular fabric) The more I thought about it though, the more I figured that maybe I could use that ugly fabric and make something I can call beautiful.

After having cut it into thin strips and wrapping it around Candy's legs, I thought the fabric wasn't too bad like that. So, I cut in into thin strips again-very thin at 3mm wide. I wrapped those strips around some wooden ring beads, glued and sealed with them with ModPodge and set forth to string a simple necklace with a pendant.

You'd think that I would have learned by now that nothing ever works out "simply" for me. First problem was the pendant. I wanted to do a rubbing of a simple flower on the fabric and then seal it in resin on a flat-backed bezel. I discovered that I didn't have anything floral that would be suitable enough for a small rubbing, but that problem was solved by Susan who provided some flower buttons (thanks again, Susan). I made my rubbing, but then found out that none of the local shops carried a flat-backed bezel. I couldn't find a bottle cap the right size to substitute for the bezel either. Finally, just as I had resigned myself to removing the pendant from the necklace design, I found a double sided picture frame pendant that I thought suitable. Double sided just meant that I'd have to make by rubbing double sided. With some fusible web and another circle of fabric, double sided was easily achieved. The reverse side has the same button that was used for the rubbing, used as a stamp. One side is muted and subtle, the other bold and bright. I prefer soft and subtle myself, so that's the side that I'm going to have out for display.


Second set of problems came from the simple stinging of the beads into a necklace. I started stinging, got to the first fabric bead, and realized that my fabric covered wooden rings aren't beads at all, they have no holes. After muttering a few unpleasant words, I pulled out the drill and the tiniest drill bit I have and tried to drill through my rings. After a few more colourful words and a cracked ring, I had to accept that the rings weren't going to be able to have holes (well duh. If they were able to have holes in them, the bead store probably would have sold them with holes in them, right?! Sometimes I'm so obviously blond its scary.)


I persevered, and went on to the only other solution I could think of. If you can't string it on, you have to crimp it on...no matter how much I hate crimp beads. I'm sure my crimping is less than perfect, and all you jewelery making people are ashamed of me, but I like it. The red stringing wire blends with the rings and you can't really see it looped around the rings, and the whole piece is staying together. I've successfully worn it a few times to make sure that none of those crimps were loose.

I call the finished piece "Retro Rings". I think I can also safely call this one things like "fun", and maybe even "beautiful". Whatever it's called, I've completed the challenge. Now I can move on to projects (or more likely go back to projects) that use some nicer looking fabric!

Wednesday, October 27, 2010

Candy, Queen of the Fairy's-finished!

Growing up in the Elven village, Conrad knew that something just wasn't quite right in his life. He longed to be somewhere else, to be someone else.

One day, to escape Conrad visited the realm of the faeries. He sat down in the candy forest and began to weep, melting gumdrop mushroom with his tears.

Jennifer, a human also visiting the faeries, stumbled upon the crying Conrad. "What's wrong?" she asked.

"I don't feel I belong with the elves. I don't think I am who I'm meant to be. There's a very different person inside me wanting to come out, and I don't know how to make that happen!" replied Conrad.

Jennifer looked at Conrad and smiled. "Tell me about all about it," she said, "and I'll see if I can help".

Jennifer listened to Conrad's hope and fears and dreams, then she helped, as best she could.

No one sees Conrad any more, but I suspect he's happy and living his dreams to their fullest! The End.


This is the faerie I spotted on a walk through the candy forest.
Oh, she's a lollipop faerie! Cute pigtails with green button elastics, jewelery, fun skirt, celo wings and all wrapped up in a bow. She has a large lollipop wand. She tells me that it is because she is a Queen. Queen Candy. Fairy Queen of the Candy Forest. (She also insists that I spell fairy with a Y and not an IE to emphasise the difference between her and the other faerie queens.) I'm pleased to make her acquaintance, but I feel we have met before. There is something familiar about her. Recognition in her eyes? Wait, where have I seen that tattoo on her arm before...?

Sunday, October 3, 2010

Dude, Looks Like a Fairy!


If your fairy looks like an elf in drag, do you still send it to the art show? Well, the Challenge piece is due this month and I don't have time for plan B, so YES I guess you do send it. Candy has polymer clay limbs with stuffed cloth body and stands 11" tall. She was supposed to be fun and sweet and playful. Instead, she's sort of scary, but good for a laugh. Think I'll stick to cloth dolls from now on. Ya, what else is there to say? Guess there's still the possibility that I might not send her. Sorry ITK people and anyone who might have to witness her in person-I tried to make something nice!


To give her credit, she doesn't look so bad from the back view. Oh well, I guess that doesn't count. Anyhow, I have just a few more details to add. She still needs a skirt to cover that puffy crinoline. Have to do something to the shirt too, don't know what at this point. It's very black and boring the way it is though. I have a ribbon to tie around her waist and the wings have to be attached to her back too, because yes, she's a he's a fairy!


I've resigned myself to this being a cross dressing fairy, but I did try to make her look more feminine. I don't know just why she looks so masculine, maybe the chin? Boobs didn't help....

Tuesday, September 14, 2010

Changing Seasons

Clearly, Fall is just around the corner. The leaves are changing quickly, the nights are cooler and so are some of the days. I'm thrilled because I love Autumn; crisp weather, wearing shorts and sweatshirts together, beautiful colours, and no more arguments over what temperature the air conditioner is set at-it's finally off! I'm reminded of cinnamon sticks, and hot apple cider (even though I hate apples and would never drink it) and I wait excitedly for the last flowers in my garden to bloom; my favourites, the toad lily's. (Okay, if they bloom, they'll be the only flowers in the garden to have bloomed this year because I decided half way through Spring that I wasn't gardening and the garden beds were soon taken over by weeds and raspberry bushes.)


Fall's also when I take time to sit quietly and reflect on the fact that another year is close to over and I'm no further ahead than I was 9 months ago and I've done absolutely nothing that I planned on doing. Still living in the same house though I swore I was moving out. Still haven't painted the front foyer or put down the new floor. Still working the same job that I was going to quit. Haven't taken my son to see his grandparents like I intended. Haven't shopped 6 months ahead for Christmas like I wanted, to avoid being the last person out shopping Christmas Eve again this year. Hoffman Challenge-didn't fish it. Work through Skydyes-didn't get to it. Clean up the large stack of unfinished art projects sitting behind me at my table-just didn't happen. Why didn't I do any of this, please tell me why? No time. No time?! What did I do then?


Ya, what did I do? Ermm, I worked, but my hours have been cut and I'm not really there a whole lot. I didn't go anywhere over the summer. I cleaned my house a lot, even though it hardly looks like it. But really, under the 6 boxes of wire and ribbon and fabric and wool, there is a clean floor, really there is. Mostly every day's been the same. Work, come home miserable and stressed out, prepare supper, clean, ensure the kid gets to his activities on time, stare at the pile of art wanting to be done, sigh, turn around, walk away and go to sleep. Every now and then I had the ever exciting task of doing laundry or going to the grocery store with a 5 year old....


None of that seems very fun. It isn't fun, it's mind-numbing. This Fall my task is to get myself together and "snap out of it". It's time to focus on the things that I DID do, and to find ways to get done the things I still want to do.


My goal of course is to make art! While I didn't do a lot of the things I had wanted to do over the summer, I didn't do "nothing". I've worked on my distressed faerie. Standing a whopping 4.5 inches tall, she's almost done-needs only a final coat of paint on her face and to have her tiny tattered teddy bear (or maybe a frog?) needle felted. I did a lot of planning for a challenge piece that has a fast approaching due date of Oct.4th. (and I'll have pictures of these things once I find my camers) I have an Autumn themed project planned and dyed the background fabric and threads. Most significant was the time I spent with a work colleague who wanted to learn to quilt. She had seen a picture of a quilt that she wanted to make before returning to university. She had no quilting or even sewing experience, so I walked her through everything, step by step. I cut strips, she sewed. By the end of August, she had assembled a quilt top and had it basted. She's thrilled and I enjoyed the companionship. I've never had the opportunity to sit and quilt with someone before. Though I dislike piecing, I enjoyed this time-finally understanding why women have done this for hundreds of years and enjoyed it.


So, I guess I did do some things this Summer. I just need to stay on track (maybe the fast track). My goal for myself this Fall is to set aside some time for art every day, even if its only 15 minutes. I don't mean, thinking about art, or searching for inspiration, but actively working on a project. I already have a sketchbook full of inspiration, ideas and plans, I just need to do it. On my way to work (I take the bus) I crochet or knit a bag for fulling. It's easily portable and doesn't require any space or special tools. Even if I work on no other projects for the day, the bus ride is 15 minutes.


At home, in a basket next to my bed is a larger piece, complete with threads and scissors that I can put a some hand stitches into before going to sleep for the night, or on those nights when I am sleepless. No more wasted time staring at the ceiling. Again, its a project that's uncomplicated and can easily be picked up and put down-I don't want something that takes too much concentration at 3am, but I am actively creating now. I have stitches to show for my time and feel that I am making some progress towards my artistic goals. Whatever more complicated,detailed or larger project I'm working on is set out on my table for the days when I have larger blocks of time to work. It has been a difficult internal struggle to decide what time I can devote to work on a project. Up until now, large blocks of time have been devoted to necessary things like cooking and cleaning. I've decided that Monday evening, when my son is gone for an hour and a half to Karate, is now MY time. Surely the house isn't going to blow up if the dishes wait for an extra few hours. I can freely paint, stitch and burn things without interruption during my time. It's going to take a little while to stop feeling guilty about using this time for me, but I'm going to keep at it. Besides, if I'm happy, it's better for every else around me too.


Oh, on a completely unrelated topic , just in case you haven't noticed, the missing blog pictures are back!


Tuesday, August 10, 2010

Kami

Well, I give up on finding a solution to all the missing pictures, but it seems that I can repost the picture, so here's Kami in her current state.

Invisible Art.

Thanks to Susan, for telling me my photos are missing. Guess what, they're still missing. I don't have a clue how to get them back. I've evolved beyond, "well that's lousy" to some more colourful phrases. Guess this is what you get for changing the background template.

Pretty unfair to promise pictures of new work in progress and then make you wait like this, eh? Well, hopefully soon. If a kind, internet savvy person happens to be reading this can you please tell me how to get my photos show up again. The Picasa Album that they automatically upload to still exists, so I just don't get this.

Wednesday, July 7, 2010

This Is Supposed To Be Fun, Right?

The best laid plans can always spoil. My most recent plan was to do this year's Hoffman Challenge. I have the fabric, have the pattern all planned out, and in fact, have the doll half done. But I'm quitting. Have quit.
I bought the fabric because I loved it and wanted to use it, not because it was the Challenge fabric and I intended on entering the Challenge. This is good-means I'm not the slightest bit upset that Kami isn't going to go to California. But why quit now? I still have enough time to finish her and send her before the Challenge deadline.

There are lots of reasons , but mostly because of a brief conversation I had about her with an acquaintance and local artist. She inquired a few weeks ago if I had yet finished the piece. I replied that I hadn't and expressed some frustration with getting Kami to go together how I envision. Her reply was, "I hope you are having fun with the process". And I was. I was having fun.

A few weeks have passed since then, and I've stopped having fun. I have lots of ideas about how I'd like to see this doll come together, and about what accessories she requires. Many of these ideas, however, are against the contest guidelines; things that would make the figure too large in diameter at the base or accessories that are possibly fragile. I've drafted and redrafted the pattern so many times already. I'm frustrated and ready to find out how aerodynamic Kami is if I pitch her off the balcony. I've come to a point where I have to decide whether it is more important to finish the doll to the Challenge specifications, or let the doll speak for herself and become who she tells me she wants to be. Obviously, I realize that working within the confines of the contest rules is part of the challenge, but like I said, I didn't start this project with the intentions of entering the Challenge anyhow. I've decided to not enter the Challenge to let Kami be who she wants to be without any restrictions.

There's also the more selfish part that doesn't want to spend every moment of every day that I have sitting inside and sewing her. It's summer, it's beautiful outside. I want to be outside in the sun, plant flowers with my son, play in the rain, pick berries and sit under the apple tree and paint. Yes, it's all my fault that I've left this doll to the last minute when I've had the fabric for months and months now-but projects just work better for me when completed under pressure.

So, with the decision to not stress out and send Kami to California (what does a Japanese water spirit really want to go to California for anyhow?) I'm happy again. I am once again having FUN with her, and this art thing is supposed to be fun, right?! Since I'm not sending her to be juried, I can share her with you now too. Not finished, not pretty, but promising. I really do like her. I have much hope for this one so I won't send her for flight training off my balcony (at least not yet).

Sunday, June 20, 2010

Knit and Full and Handbag In a Day (or maybe a week or two)

What a busy time I've had the past few months. Personal and family commitments seem to take over in the spring-but there has to be time for art too. This semester's course, Three-Dimensional Quilts, at St. Lawrence College has kept me creative. With 4 days left to have a project to show for my time in this course, I've been very busy the last few weeks.

My personal goal was to use lots of 3 dimensional embroidery stitches on a finished piece. So far, no piece finished, let alone a hand embroidered one...but we're getting there. Actually, that's not true. The last 2 days were spent at the college with friends working on individual projects and having fun. I spent lots of time working on various projects, and did finish my purse-complete with polymer clay buttons.


For this course we were asked to knit and then full a small purse or handbag. I thought this was an excellent time to try out Kool-aid dying, so I bought a few balls of white wool and went Kool-aid crazy at the grocery store. I wanted to dye the wool blues and greens and purples (my idea of ocean colours). Problem one-you can no longer buy that really bright berry blue Kool-aid in Canadian grocery stores. I went to EVERY grocery store in the city. Later I found out that it's been discontinued-at least in Canada. I did eventually find one store that carried Ice Blue Lemonade Kool-aid. Very pale, pastel blue. Go to the grocery store and buy 24 packages of Kool-aid, I dare you! The cashier thought I was a bit crazy.... Anyhow, I dyed my wool yarns, tried jello as a dye too for the fun of it and ended up with some beautiful wool to knit with.
Problem 2, I don't knit. I had to find a book to teach me how to cast on and then how to knit and purl. Then after a few rows of that, I got bored and tried out some patterned stitching-diamonds, diagonal lines, railroad tracks and the like. I Just kept reminding myself that it didn't matter how sloppy it looked, it was getting fulled. After 2 days of endless knitting, I finally ended up with a piece large enough for my liking. Not pretty, not neat, not stitched with even tension-and it doesn't matter. I stitched up an I-cord with a button hole on either end and threw it all in the washing machine to full. If you've never fulled anything, I highly recommend it. It's like magic-ugly knit, turned into beautiful thick fuzzy fabric!


In the process of creating this bag, the only way I could think of adding a handle was to attach it with buttons. Since I've done this, I see most everyone else just sewed the handle right over the side seams of the bag, but the button works, and also allows for the versatility of removing the handle and using the bag as a clutch. I'm not the kind of girl to go out and buy buttons, I made them. It took me 8 hours of mucking around with polymer clay since I have not spent much time experimenting with polymer clay canes, but I think this attempt was hugely successful! I have lots of the cane left unbaked-so if anyone can't stand to be without a piece, contact me.

I do have to say, I love this purse. I love the colours, I love the wavy shape, I love the buttons. One lady asked me, "who put those gawdy buttons on that beautiful bag?" She didn't think blue buttons worked-I think they do, even though there isn't much blue visible throught the bag. As always, your opinions are most welcome.

Tuesday, May 4, 2010

Step Into the Forest

I've been a bit obsessed with the "tree" theme the last year, so it isn't surprising that my finished project this semester involves trees.

The assignment was to paper-piece the traditional "Courthouse Steps" pattern. I used different tree and leaf patterned cottons and really did like the colour composition, so I quilted it and put on a binding. Nice, but all it did was sit there. Nice blocks of colour-but nothing more than blocks of colour. I spent far to many hours on it to file it away in a binder as another "sample".

After a few days of having the quilt lie around on my table like a place mat, I decided it wasn't enough to just have the tree fabrics, it needed sculpted trees on it too. So, I pulled out a role of wire and a box of beads, and twisted up a few trees. I placed the trees on the quilt and it immediately came to life. In fact, I liked it so much I thought it was worthy of using some silk (I don't use silk for anything). Stitch the quilt to the silk, pull the silk around some stretcher bars, tack on the trees and presto!
If you look at it from across the room, you see the simple blocks of colour. Take a step or 2 towards it and you start to see 3 strange black lines running vertically up the quilt. Curious? Step closer. Now you can see the branches twisting towards you. Step up even closer to the trees and you can see the leaves. The side view (how I see it when I'm at the sewing machine) is quite charming too!


Sunday, April 18, 2010

A Visit to the Mississippi Valley Textile Museum

Something has happened to me me. Probably it happened some time ago, and I just haven't noticed until now. This past Friday I took a bus trip with the Cataraqui Guild of Needle Arts to visit the Mississippi Valley Textile Museum in Almonte, Ontario. The museum currently has on display a replica of the Bayeux Tapestry done by Prof. Raymond Dugan-who was lecturing on his work that day. But, before I talk about the display, I still have to tell you what happened to me!


Friday morning was dark and cloudy and grey. We sent out from Kingston towards Brockville (to pick up another group of ladies) , a trip I've taken many times before, but I've never seen it quite like this. Everything excited me! There's nothing much to look at except rocks and trees and water-and I found it all fascinating. A thin width of grass grows right along the side of the highway and it was the most beautiful rich green. Immediately behind the green strip is a wider strip of light brown in the form of dry reeds, standing tall and blowing gently in the wind. There are beautiful rock walls which tower over us, as well as gorgeous rocky plummets to gaze down into. There are forests on either side of us-mostly deciduous trees-brown and naked-but there's a spattering of greens too, from the conifers. The forest grounds are covered in dried leaves. It might seem like autumn, until you look up to the tree tops and get dazzled by the yellow green buds popping out, highlighting the red-brown buds hiding in the red maples.

I am mesmerized by the colours, then the highway narrows and the trees on either side of us are all evergreens now. It's warm and dark and comforting. And almost as fast as I realize that, the highway wides again and we're back to the trees and rocks and water. Only now the colours seem even brighter than they did moments before.

The bus stops in traffic for a moment and I see we are at the top of a drop in elevation. I can gaze down to the still, glass-like water and see the reflection of the trees and think I can stare at this forever. "Stop the bus" I want to cry out loud. I want to take a photo and capture this moment forever. It starts raining and my perfect reflection in the water is fractured-it moves and dances-and I'm wowed by the beauty and the possibilities in the changing image. I find myself overwhelmed and wanting to cry. In fact, I almost did cry-then I snapped myself out of it. I can't cry at beauty on a bus of 50 women of whom I know 1-they'll all think I'm crazy. (Of course now that I think about it, Beth already knows that I'm a little bit crazy-so she could have explained me to everyone else somehow!).

After leaving Brockville, the bus travels along county roads rather than the main highway, so now I have more to look at than just rocks and trees and water. Now there are houses and farms and barns and the occasional quaint little town store! There are more colours to dazzle me, with the early spring flowers in bloom. I'm awed by the designs in freshly plowed berry fields, intrigued by the variety of shapes in houses, amazed at the many lines of windows. I'm fascinated the way the churches stand above their towns and point towards the heavens and cast shadows on the grounds.


Stuck right on the side of the road was a giant fire engine red barn. (Ohmygosh--STOP THE BUS!!!) It is a giant metal barn, painted red from bottom to top, including the roof, but the paint on it is peeling back in layers, revealing the silvery metallic underneath. What wonderful texture! Damn it for being on a bus so I couldn't stop for any photos. Of course, if I had been driving I probably would have spent so much time stopping to take pictures I'd have never made it to the museum, so I guess it's a bit of a mixed blessing.

I can't forget about the hydro pole either. Yes, your regular wood log stuck into the ground and supporting numerous wires. (Stop the bus!) This pole looked like it had been there far too long; rotted away, riddled with holes, chewed up by bugs. It was begging to be touched.


Now, of course, the museum. My first word of wisdom is don't go upstairs as long as the nude exhibit is still there-too weird and not really appropriate for a textile museum if you ask me-and far from the best use for that space. It was photography not textiles. But that's just my opinion. Someone else somewhere probably loved it. As for the tapestry-go see it if you get a chance. Truly, it's incredible. I could have spent a long time looking at it and not seen every detail. While just seeing the piece is wonderful, getting to hear the man who stitched the piece speak about it was even more worthwhile. His knowledge of the tapestry, its history, his passion for it and the obvious love he put into making his replica brought the piece to life. I'm certain that everyone there that day left feeling the trip was more than worth making.

My family and friends asked how the museum was, and I bored them all to death with the details of the ride up. They all just looked blankly at me, said things like, "Jenn, it's just trees and rocks and water. Not like you haven't seen them before". But they are all wrong. I have traveled down that road, but never before have I seen it like this!

Sunday, April 11, 2010

2 Tree Nymphs Complete!

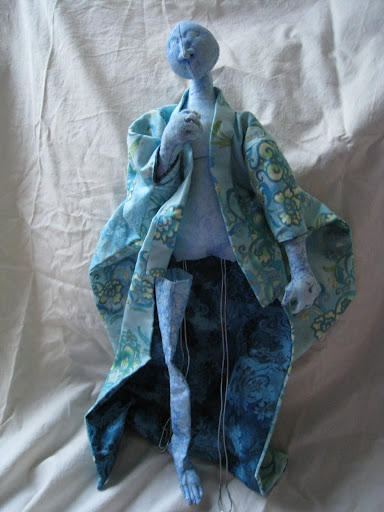
Both Tree Nymph dolls are finally done. Completely done! I don't seem to say too often that a project gets finished, so I'm happy with this. Actually, Treya has been done for some time but I always though she needed a tree stump base. Now she has one.

Let's start with Autumn. It's not the best picture, but it's the best I have for now. I wanted her look look "aged" and "dried out"-not necessarily old. Needle sculpting her face with the jowls was a good decision I think. She's wearing tattered cheesecloth that Susan Farber hand dyed (thanks again Susan!) and I'm so thrilled with how well it complimented her hair. Her shoes are fabric that I cut out in the shape of oak leaves and sewed up. Though you can't see, she has some lovely leaf shaped beads in her hair as well. The wings took a very long time, but they are awesome. When I started I obviously thought, "yes, this might work", but the result surpassed my wildest expectations.
I cut out my leaf shapes and then attached different fibers and some Angelina for a bit of sparkle. I made a sandwich of my now coloured leaves with some Flexifirm and another layer of felt and then covered the front and back of each leaf with curtain sheer. Add some stitches, a little heat and presto-autumn leaves! You can see in the picture here with all 4 leaves what they look like before burning and after burning.

Finally, here`s Treya, with her new needle felted tree. I hope she appreciates the numerous times I stabbed myself with the felting needle while constructing her home.

Sunday, February 21, 2010

Autumn-The Development of an art doll.

I've moved on the the second of my Tree Nymph Dolls. Treya was the first, I made her last spring. In fact, she was my first doll. She's not perfect, but I consider her a huge success. I had so much fun with her I decided that I need to make a tree nymph for each season. Treya represents summer. Autumn, now-well that's obvious. I began by bending a wire armature into my desired dimensions and pose. Sitting, she is 6.75 inches tall. I then wrapped the armature in thin strips of polyester batt-building up her body shape- and randomly sewed through it with upholstery thread to secure.

I then cut 2 inch wide strips of her body fabric and sewed it in half. Treya was made with 1 inch wide strips of the same fabric but I found it frayed very easily. I was hoping that by sewing the strips in half the fraying problem would be minimized. It did help some, but because the strips were now twice as thick, I still needed just as many stitches to tack down the strips to the armature. Basically, I started at the feet and wrapped the strips around the armature working my way up to and around the head, and then put hundreds of tiny stitches in the fabric to hold the rounds together. Slow and tedious work. I might try cutting the fabric on the bias next time so it has a bit of stretch and wrap smoother, and with any luck tighter so as to require fewer stitches.

Many people have been looking at my wrapped armature and thinking that this doll is a man. Okay, yes, it has broad shoulders and a broad (and yes-flat) chest in comparison to its waste. And I accept that if I was going for human, then I've definitely got the basic shape for a man. But this shape wasn't unintentional. These dolls are supposed to be trees. When I look at a tree in the summer, I see leaves, beautiful green leaves. Very full and lush. The branches are mostly hidden by these leaves and the trunk doesn't draw my focus. I attempted to portray this with Treya, the focus of her being the leaves, and everything green. In autumn, once the leaves have finished their spectacular colour displays and begin to fall, I see the same tree in a different way. No longer hidden by leaves, I see the branches, intertwined, reaching, stretching from the trunk. With no leaves to dazzle me, I now take time to notice that trunk, and how assorted its patterns and colours and textures are. My Autumn needed to get these idea across-so she is broader and bolder than Treya. And for Heaven sakes, neither doll has breasts. They're trees, they don't needs breasts...men.


With Autumn's armature finally wrapped with her base fabric, the fun begins. I had a length of variegated brown wool that said "trunk" to me, so I wrapped her legs with it and couched it down. From her waist up, which I've determined is where the trunk ends and the branches start, I've embroidered her branches. I have plans for her shoes and her wings. Her hair and her head are ready to go. My only hold up on her now is her clothing. Treya doesn't have any clothing to speak of so I didn't have this problem with her. I was going make Autumn a dress out of some died cheesecloth, but now that I've done all the embroidery of the branches on her upper half, I'm questioning if I should do that. The branch embroidery is lovely, and important in her overall design, so I'd hate to cover it up. But I don't feel I can leave her without something on her top half-I envision her as representing the beginning to middle of fall, when there are still spectacular colours to behold, but lots of leaves have fallen too and reveal the structure of the tree beneath. Maybe one layer of cheesecloth will be transparent enough to reveal the branches beneath. Maybe I should do more of the branch embroidery on top of the cheesecloth. Another possibility I've been considering is making her a jacket rather than a dress so it can be open in the front and the branches can be seen underneath it. Any ideas or opinions would be happily received!

Sunday, January 31, 2010

Lots of Rectangles Really Do Make a Square-Finally!


Remember those 15 blue squares that weren't even close to square? I thought, if I can't even do those then how am I going to manage the blocks where the colours have to change throughout the logs? Well I did one, the first block where the water meets the sky, and its actually a square!!! It worked! I don't know why since I didn't do anything different with this block than the previous 15. I have faith in myself again that I can make this project work. This of course means that the 15 sky blocks have to come apart and be redone (sigh), but so be it. I don't think I'm ever going to become a quilter, but surely I can get through this one project. And if I can't then I have this one cute little block!

Sunday, January 24, 2010

The "Puffin Project" takes off

I knew my assignment this semester was to be based on the Log Cabin pattern. I pondered for months what I could do with a log cabin, not being a quilter. Well, I still don't know, so I guess its quilting for me. Besides, half the fun of taking a course is being challenged to work outside of your comfort zone, right?


It's not quilting in general that doesn't appeal to me, I think it's more the piecing- cutting perfectly good fabric into geometric shapes and sewing it all back together to make a single piece of fabric,ugh. I'm partial to paint. Piecing is precise-and I am most certainly not. I can't cut a straight line even with a rotary cutter and grid-marked mat.

Deciding exactly what to design out of log cabin blocks satisfyingly fell into place for me. Around Christmas I bought a copy of Leni Levenson Wiener's book, Photo-Inspired Art Quilts. While the book didn't teach me anything specific I didn't already know, seeing the step by step process of taking a picture and turning it into an art quilt was inspiring (and I love her art quilts because they aren't pieced!). I am going to sit down and work through her process with one of my photos sometime-maybe after I'm done this log cabin project.

Trying to stay focused on log cabins, I sat down in front of the computer and searched "log cabin quilt". I spent several hours looking through thousands of pictures of beautiful quilts. Really beautiful quilts to be seen, but none of them inspired anything out of me. I was still too focused on wanting to make a picture and not a design if that makes sense. Just as I started thinking, maybe I shouldn't take the class this semester and focus on what I want to do, I found Flavin Glover's website http://www.flavinglover.com/. Her homepage had pictures some lovely log cabin quilts and something even better-a tab titled "Pictorial Log Cabins"! If ever there was a time to shout "Eureka!" that was it. Pictures out of log cabins! I could really make a picture out of log cabin blocks. I love her piece, "Geese in Flight"-colours changing throughout a single log.

The problem with this pictorial log cabin method is of course that you have to be able to draw a simple picture and I'm not a drawer either. I made friends with a pencil and a large eraser, sat down with a sheet of graph paper and eventually ended up with a drawing of a puffin. I squared off all the round edges of the bird as if it were a cross-stitch pattern and eventually had a simple pattern I can work with. I did it, I drew a bird!

Fun's over now though. I thought I'd start with the easy part. 15 blocks are all sky, so I began with those. Log cabin blocks are supposed to be "easy, a great block for beginning quilters". I struggled with the first set of instructions I read on how to construct on of these blocks-not a good sign. Once I figured it out, I made one and found out just how straight I can't cut with that ruler and rotary cutter. 15 sky blocks are done now, but I don't think a single one of them is the same size nor am I convinced that any are perfectly square either. If I could start over, I think I should have foundation pieced this, but it's too late for that now. If I can't handle these blocks with solid logs, the logs with changing colours are going to be a real disaster. Normally I'd be happy to call a project a failure because I've enjoyed the process, but I haven't enjoyed the process of piecing these 15 blocks together at all. Maybe I was a little over ambitious with this one and should have just done something with "wonky" log cabins. I am stubborn though, and failure isn't an option, so I'll be sharing how the puffin project progresses.